
22:53
27:37
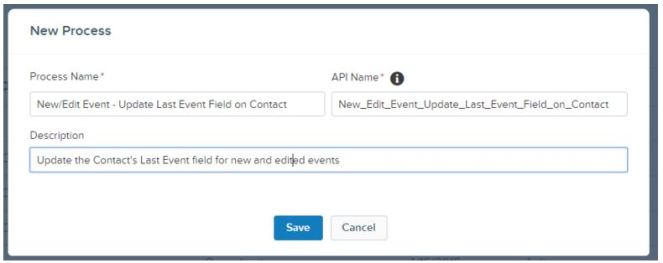
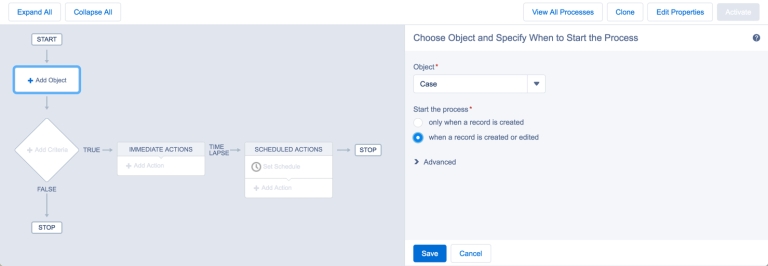
Check account process builder. You need to select when the process. Starts when a record changes itMoreCheck account process builder. You need to select when the process. Starts when a record changes it can be update or create go ahead and click on save.
How to launch a Salesforce screen flow from a button?
Create an auto launched flow. Create a record type variable available for input to get the opportunity record from the Process builder. Create a data element of type Update records to update the Opportunity stage. Then create a task of type call and enter the details like Due date, Assigned to, Related to, etc.
How to call flows from apex in Salesforce?
Oct 29, 2015 · Use autolaunched flow to automate complex business processes without writing code. In order to launch a flow from a process, you must activate the flow. For this scenario, We just need 1 process only, which is Record Create. Technically, to share a record, we need to create a record for the object with end with __Share.
How to update records in Salesforce flow?
Double-click the Run Data Processing Job node to open it. In the Category section, select Data Processing Engine. In the Action field, select the data processing engine definition that you want to run. Enter appropriate values for the input variables. Click Done. Save your changes, and then activate the flow. To run the flow, click Run.
How do you trigger Autolaunched flow in Salesforce?
Configure the schedule trigger in the Start element of your autolaunched flow. Creating or updating a record can trigger an autolaunched flow to make additional updates to that record before it's saved to the database. A record-triggered flow can update a Salesforce record 10 times faster than a record-change process.
How do I activate a flow in Salesforce?
Open the flow version in Flow Builder. Click Activate or Deactivate in the button bar.
What triggers an Autolaunched flow?
The flow trigger can be a schedule or the new and changed records of a specified object. Without a trigger, you must set up other things to launch the flow, such as custom buttons, processes, Apex classes, or even Einstein Bots.
How do I activate an older flow in Salesforce?
Activating a version of a FlowCreate a new Flow by copying the activated Flow.Modify the activated Flow and save it as New Version or save the activated Flow as New Version and modify it. ... You can have multiple versions of a Flow, but you can only activate one version at a time.
How do you activate flow?
You can activate a plan by dialing *129*6#*129*6# and selecting the Anywhere Talk & Data Option. Customers can also subscribe to a plan through the MyFlow App.
What is an Autolaunched flow?
A schedule-triggered flow runs only at the scheduled time and frequency. Autolaunched Flow with a Record Trigger. Makes before-save updates to the new or changed record that launches the flow. Only these elements are supported: Assignment, Decision, Get Records, and Loop.
What is the difference between screen flow and Autolaunched flow?
Screen Flow-Requires user interaction, because it includes screens, local actions, steps, choices, or dynamic choices. ... Autolaunched Flow-Doesn't require user interaction. This flow type doesn't support screens, local actions, choices, or choice sets.
Can we call trigger from flow?
In the Start element of an autolaunched flow, you can specify a trigger that launches the flow. The flow trigger can be a schedule or the new and changed records of a specified object.
Does flow run in system mode Salesforce?
We will use Flow and Process Builder because it runs in system mode. Before proceeding ahead, you have to understand User mode and System mode in Salesforce. System mode: In which the object and field-level permissions of the current user are ignored.Nov 21, 2020
How do I access flows in Salesforce?
Provide Access to Use FlowsFrom Setup, enter Profiles in the Quick Find box.Click Edit for the user profile for which you want to give flow access.Under General User Permissions, select Manage Flows and Run Flows.Save your changes.
What's the difference between Salesforce flow and flow builder?
In Salesforce, a flow is an application that automates complex business processes. Simply put, it collects data and then does something with that data. Flow Builder is the declarative interface used to build individual flows. Flow Builder can be used to build code-like logic without using a programming language.Aug 11, 2021
How to activate a flow in SalesForce Lightning flow builder?
Activating a flow in SalesForce flow builder can be done in the setup process automation menu, where it is necessary to create a new view to be able to add a flow in the view using the flow builder, where it will also be possible to run the flows.
Access the SalesForce account setup
Start by opening the setup menu which is accessible in the upper right corner gear icons of SalesForce accounts next to the navigation bar.
Creating a new view for flows
The first step to be able to activate a flow will be to create a view, by clicking on the create new view link.
Creation of a new flow
Now that a view has been created, add a new flow to that view by using the new flow button.
Using the SalesForce flow builder
Using the SalesForce flow builder to activate new flows starts by clicking on the start button, which is displayed in the flow builder from the beginning.
Activating a new flow in the flow builder
Save the flow newly created with its corresponding assignments in the flow builder by entering a flow type, which will be one of the following:
Activating the flow created in setup
Once flows have been created, activate them by ticking the corresponding box under the is active option of the flows list.
Is camel case required in flow?
In Flow, we’re stepping into the developer world without really having to write code. It obviously isn’t required that you use camel Case as your naming convention, but it is important that you follow a consistent naming convention.
Can you get away with a fault message in Salesforce?
When your Flow fails its important for everyone to be alerted. If you’re a Solo Admin, then you can technically get away without using a Fault Message, because Salesforce’s Email Alert will go to you. However, if you have more than one person developing in your Org, this is a requirement! By setting up a Fault Message, you can easily alert all of the Admins and Developers of the issue.
Can you run a Visual Flow once?
This is an easy fix and you’ll only run into once (per Org that you work in). Make sure any users that need to access a Visual Flow have the System Permission Run Flows. If the End User lacks this permission and they attempt to access the Visual Flow they’ll receive an error.

Summary
Launch on Lightning Page – Will Run in User Context
Launch with Button – Will Run in User Context
Launch with Action – Will Run in User Context
Launch in Process Builder – Will Run in System Context
- In the actions, click Add Action > Choose Flows as Action Type > Choose the flow you want to launch and configure the input variables below. Please note that only active autolaunched flow can be called from Process Builder.
What Is context?
How Can I Change The context?
Popular Posts:
- 1. how to activate replacement windows phone
- 2. how to activate gear s3 att
- 3. how to activate rowan som email
- 4. how to activate steam overlay mac
- 5. how to activate love lush to the sound of tips on chaturbate
- 6. how to activate hearts of stone expansion witcher 3
- 7. how to activate secret keyboard on iphone
- 8. what keys do i press to activate home key
- 9. how to activate new google pixel
- 10. how to activate photoshop cs6 without serial number